It's odd, the things we choose to game. Wargames in general are odd, in that war, of course, is not fun. But we wargamers will game almost any period that is conceivable. I've had a hankerin' for playing a Post-Apocalyptic game lately. A true Post-Apocalyptic existence would be very depressing to actually live. But it's a hoot to game!
A while back, I "discovered" a free game called "Crimson Dusk" or as it's now known, "Crimson Dust."
It can be located here.
I played Crimson Dust 3.0 but I think the author is up to 5.0 now (in playtest). From his website:
"
Crimson Dust - focuses on small scale skirmishes, with between a single figure and perhaps 15 miniatures to each side. It is based on a D6 (six sided dice) system, where a player rolls multiple dice to decide to effectivity combat and other tasks. The rules contain full rules for combat including pyschic powers and Hackers and a whole host of sci-fi technology."
and
"
Crimson Dusk - is the first wargames rules produced, work on it has currently stopped as work on Crimson Dust has taken over. It is still available for use though. It is a game designed for platoon level games of around 15-30 miniatures a side. It is based on a simple D10 (ten sided dice) system, with few complexity modifiers. The rules also contain full listings for how to design your troops and set points cost to them so you can compete against your friends for mastery of the tabletop. And the great news is that the rules are entirely free to download and share."
Unfortunately, I can't find the current "Dusk" version, but that's o.k. as I wanted to play a skirmish game anyhow.
The game took six turns, played over the course of two evenings (note-taking and pictures drastically extending the time required).
You can click on the pictures and they will magically expand to fill your screen.
"ooOOOoooOOOooo, spooooky"
And now, the participants:
 |
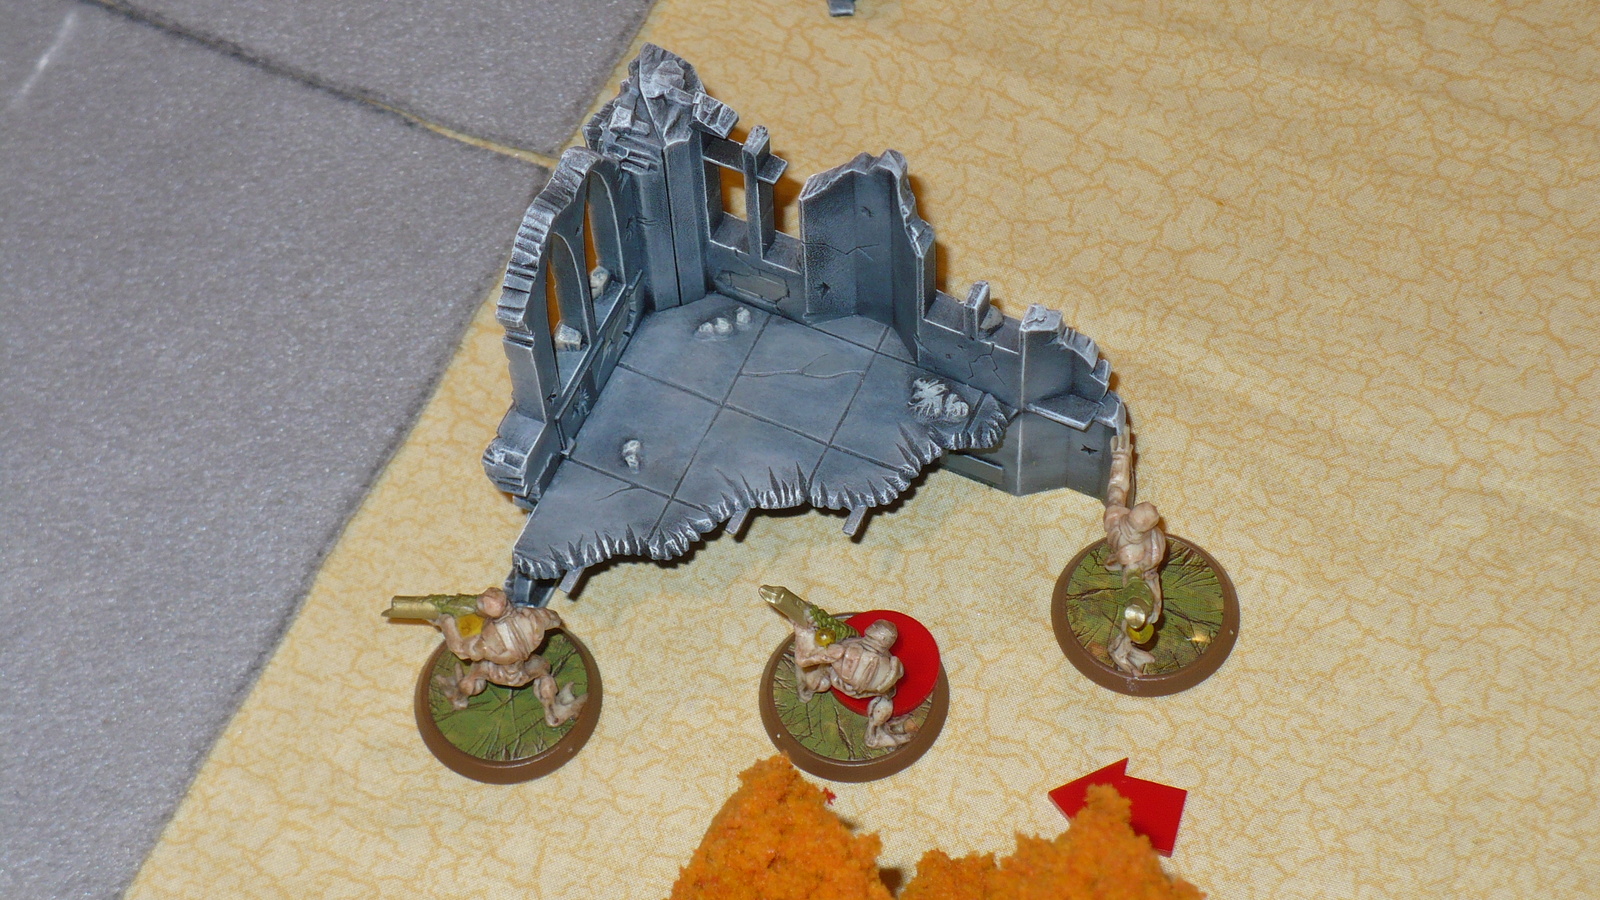
| The Defenders: the Glitter Gang aka the Diamonds. From L to R: the Leader (Veteran), 2 Green 'juves, 2 Regular "troopers." Armed as follows: Bolt Gun, Pistol, Pistol + Club, Bolt Gun + Club, Bolt Gun. Everyone has knives, too. They are built from the Medio Archetype. |
 |
| The Attackers: the Scrags, a bunch o' Mutants (or something). From L to R: the Leader (Veteran), 2 Greens, 2 Regulars. Armed as follows: Assault Rifle (in the rules it can be a laser rifle or whatever), Rifle, Rifle, Assault Rifle, no ranged weapon. No melee weapons, except for the figure on the far Right, who has a "Sword" and a "Knife" and the Combat Master feature. They are built from the Suboles Archetype. |
 |
| The battlefield, 4' x 4'. The Scrags enter from the bottom Right. The Glitter Gang is at the top Left/Center. Ostensibly they are defending the power generator in the top Left corner; in reality it was just something to move the Scrags towards while I worked out the rules. |
 |
| The Scrags, ready for the first turn. |
 |
| A Scrag-ian view of the table. The Glitter Gang is in the far distance. |
 |
| And here's the Glitter Gang, ready to rumble. |
 |
| A glamour shot of the Power Generator, which really played no part in the game at all. You're welcome. |
 |
| Turn 1. The Scrags win Initiative, with a d6 roll of 6 to the Glitter Gang's 4. Each figure has two Action Points (AP). I Activate the Leader using his Leader 1 characteristic, which enables him to move a second figure with him (Scrag #3). They both move twice. Movement is accomplished by 1d6 + their base move speed of 2". Both rolls are 6 + 2 = 8", for a total of 16". |
 |
| Play then passes to the other side. I Activate the G.G.'s Leader using the same technique, and move her and Moonstone once, into a little better cover. d6 = 3 + 2 = 5". |
 |
| I Activate Scrag #2 (Scrags aren't really big on personal names, you know). He/She/It moves twice. 6" + 8". |
 |
| I Activate Pearl, who moves twice, thinking to get around behind the enemy. 5" + 7". |
 |
| I Activate Scrag #1 (a Green), moving once. 8". |
 |
| I Activated Coral (a Green), moving once into some cover. 8". |
 |
| I Activated the Scrag 'Heavy,' and moved him twice. 3" + 7". |
|
 |
| Last in the Turn, I Activated Amber, moving her into cover. 4". |
 |
| End of Turn 1 Troop Dispositions. |
 |
Turn 2. The Scrags again win Initiative, with d6 of 2 vs 1. I Activate Scrag #2 (a Green) and move Him/Her/It a double move to cover. 3" + 7".
|
 |
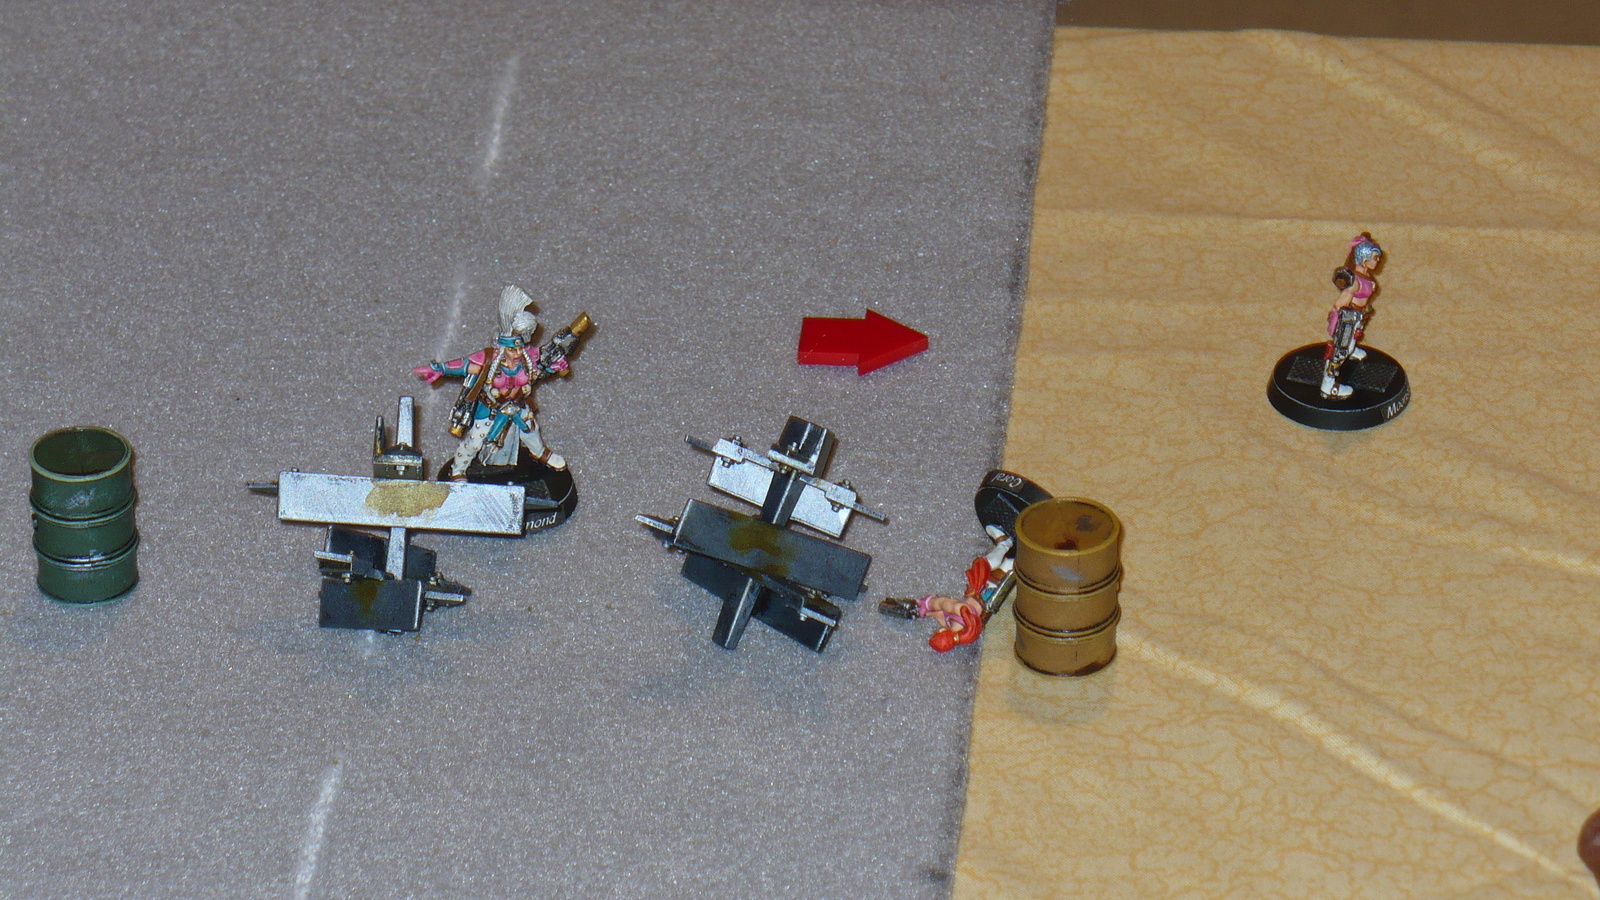
| I Activated Moonstone (a Regular) in order to shoot at Scrag #2. The distance measures out to 21". She has a Range value of 7, so I roll 7d6, hitting on 5+. The rolls are 2, 2, 3, 4, 5, 5, 6 = 3 "scores." The Scrag's Defense is 1 + 2 for being concealed = 3, which cancels out the 3 scores; 0 hits. However, He/She/It has to take a Morale roll: I was still cogitating on the rules and didn't really play this part correctly. The end result was that the Scrag stayed where He/She/It was, and Moonstone ended her turn. |
 |
Ready to move on, I Activated Scrag #3, moving once for 4".
|
 |
| For Scrag #3's second Action Point (AP), He/She/It shoots at Coral at 18.5" away.
This introduced me to the first of a set of contradictions in the
rules: one page indicated that ranges were measured, for example, 13-18
and from 19-24; and a second place indicated they were from 13-18 and
from 18-24. So at 18.5" which range set should I use? Usually I favor
the Defender in situations like this, but for some reason this time I
chose to use the Attacker-friendly version. Scrag #3 rolled 9d6,
hitting on 4+ for 5 scores. Coral's Defense was 3, meaning 2 hits. I even
gave her an Armor Roll for being behind hard cover. |
 |
| The end result was 2d6 + the weapon's Strength; both d6 results were higher than the Armor Roll. Coral is KILLED! |
 |
| Next, I Activated Diamond (the Leader) and moved her a trifle closer (3") for a better shot (20"). This removed any concealment the Scrag had from the ruined building. Diamond rolled 8d6 hitting on 5+ for 3 scores. The Scrag's Defense was 2, for 1 hit. The one hit got past the Scrag's Armor, for 1 Wound. This was a Critical Wound, halving all Stats. Scrag #3 then needed to take a Morale Test, resulting in 3 Passes and 1 Fail; by Passing more than Failing, It basically is O.K; It should move 1 AP to cover, but It has no AP remaining, so I just left where It was. |
 |
| I Activated the Scrag Heavy, moving twice (7" + 3") intending to get to melee as quickly as possible. |
 |
| Pearl Activates. This time I decide to try the Run move action. This uses 2d6 + 2" for each AP, with penalties if she is shot at, plus she can only move in a straight line. 6" + 12". |
 |
| My thought is to get her around to the flank or rear of the Scrags. She is pretty close already! |
 |
| I Activate Scrag #1 (a Green), moving twice. 4" + 6". |
 |
| Next, Amber Activates and moves 6". She uses her second AP to shoot at Scrag #3 at 18". She rolls 6d6, hitting on 5+ for 2 scores, for 1 Hit (after It's Defense). The Scrag's Armor Roll is extremely good (a 6), and the Pistol is not able to actually Wound the Scrag. It is forced to take a Morale Test, with 1 Fail and 1 Pass. It must move 1 AP to cover, but It has no AP remaining, so I intended to move It on It's next turn (and promptly forgot). |
 |
| Lastly, the Scrag Leader double moves. 4" + 3". |
The Glitter Gang had no one to Activate since Coral was dead, and thus Turn 2 ended.
Turn 3. The Scrags win Initiative yet again, d6 of 6 vs 1. I decide to "hold" the Glitter Gang's Leader's Action.
 |
| Next, I Activate the Scrag Heavy, and run Him/Her/It twice for 9" + 7". He/She/It'll be within striking distance next turn. |
 |
| I then have Amber (a Green) also run (for 10") then a normal move (for 5") which puts her into melee! It was exactly the distance I needed. I hope this works: a Juve against a Heavy.... |
 |
| Melee is not a separate AP, so it begins immediately. Amber is Assault 6 with her Club, rolling 6d6, scoring on 4+. She achieves 3 scores. The Scrag Heavy is Assault 5 but has the Combat Master attribute with a second weapon (a knife). I wasn't completely certain how the second weapon was supposed to work, but in the end it didn't matter anyway. The Scrag achieved 6 scores on 7d6. The final result was 2 hits on Amber, who had no Armor Value, so the Scrag rolled an 8 and a 9 versus Amber's 1, meaning 2 hits that connected. Amber was KILLED! |
 |
| The Scrag Leader then shoots at Diamond, at 18.5". He/She/It rolled 10d6, hitting on either 4+ or 5+ (depending on which chart I decided to use for the range). This time I chose to go in favor of the defender, so instead of 9 scores(!) there were only 4. Diamond's Defense value was 5, vs 4 scores meant 0 hits. (For the fun of it, I tried the 9 scores, which resulted in 4 hits, then compared the hits versus Diamond's Armor value roll, which the final result was 2 wounds, meaning Diamond would have been killed too. I opted not go that route, as I wanted the game to continue a little longer. Plus, Diamond hadn't gotten to Activate yet.) |
 |
| After her Morale Test, Diamond got a free AP interrupt action, which she used to shoot back at the Scrag Leader, to no effect. The Scrag Leader then used His/Her/It's 2nd AP to shoot again at Diamond, with the end result that Diamond would have to crouch (which result I decided to ignore; it really began to feel like I was getting into a battle of Action Points, like Space Hulk on steroids). At any rate, Diamond Activated next and shot at the Scrag Leader (yay, isn't this exciting?) (after using her first AP to reload, having rolled more than two 1s last turn). This also ended up causing the Scrag Leader to crouch. Big whoop. Finally, I Activated Scrag #3 and moved him/her/it 4" into cover (see the picture above). |
 |
| I Activated Pearl next, really hoping for some good results this time. She shot at Scrag #2, at 15", hitting on 4+. She scored 3 times against Scrag #2's Defense of 1, for 2 hits. After the Armor Value roll, she caused 2 wounds. Scrag #2 was KILLED! |
 |
| Next Pearl uses her 2nd AP to shoot at Scrag #1, hiding behind the tree in the picture above (that's Scrag #2 in front there, before I tipped him over as dead). The range was 20.5" with 7d6 hitting on 5+, for 1 measly score. The Scrag's Defense value ended up cancelling out the score for 0 hits. His/Her/It's Morale Test resulted in 2 scores, meaning He/She/It was able to get a free AP, which He/She/It used to shoot back at Pearl. Range 20.5" with 8d6 hitting on 5+ meant 3 scores, but was also Out of Ammo too (1 AP later to reload). Pearl's Defense cancelled out the scores for 0 hits, and her Morale Test resulted in 1 score, 0 fails, so nothing happened. |
 |
| Next I Activated Scrag #1 to move closer to Pearl and better cover. I used the 2nd AP to reload his/her/it's gun. |
 |
| This is a view of the Pearl / Scrag #1 shooting relationship. |
 |
| This is a view of Pearl from the Scrag's perspective. |
 |
| For the last Activation of this Turn, I ran Moonstone 10". |
 |
| I used her 2nd AP to shoot at the Scrag Heavy. Range 11" with 7d6 hitting on 4+, that's sure to be one dead Scrag, right? Hardly. 2 scores, AND Out of Ammo. Yay. Good job, Moonstone. Not only that, the Scrag's Defense cancelled out both scores for 0 hits. The Scrag's Morale Test resulted in 1 score, 1 fail, meaning he/she/it was supposed to move to cover on its next Activation. But by this time I was getting pretty bored with the rules and just wanted to finish the game, one way or the other, so I ignored it. |
Please tune in next time (whenever that might be) for the exciting(?) conclusion to this game. It did continue on for 3 more turns, and things got a little faster and better.
Thanks for making it this far!