


As I mentioned last post, I'm traveling a lot, so I haven't had much time to paint. However, the dipping process is so fast that I now have two sets of 20-man Arab units finished! The hardest thing for me now is finding time to take pictures and get a blog post written.
So here are my Arabs. They are Old Glory, from their Sons of the Desert range. All pictures are clickable.
 | ||||||
| SOD-06 Arabs Attacking with Spears |
 |
| SOD-05 Arabs Attacking with Swords |
For the unit leader, I gave him a red turban/headdress to help single him out on the table. For the unit second-in-command, I painted some part of him in a light purple/lavender color; nothing too bright, just enough to help him stand out a little.

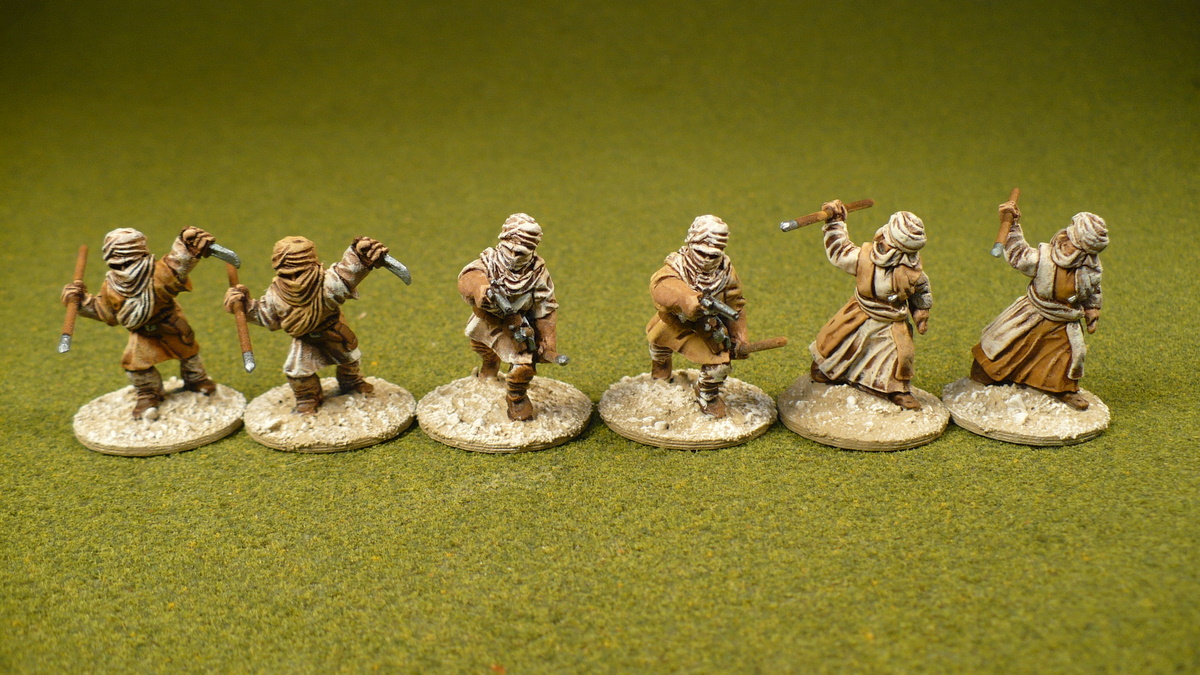

For the spearmen I had to create the spears. I did not buy the pack of spears from Old Glory because I had read about making them yourself -- more inexpensively. Naturally, I had to buy my item twice to get the effect I wanted, but it still ended up being cheaper. I first used 20 ga. florist wire but this was a trifle too small in diameter and would bend. So I next used 18 ga. florist wire and it worked a treat (as my British friends say). I snipped the wire at around 1.25" long, and tried to give the "pointy end" a pointy end. I had read where some people would take a ball-peen hammer and give the spear tip a hard hit, thereby producing a flattened spear blade. However, and oddly enough, this florist wire was very hard, and would not flatten easily. So I contented myself with making the cuts at an angle as much as possible, and the end is pointy enough to draw blood from my finger. If you look closely at the back end of the spear, it's pretty pointy too, but paint draws the eye and makes it all o.k. For the end result, I think they look fine.
When I came to the unit with swords, I ran into a problem. The metal Old Glory uses for these figures is very soft, and many of the swords did not survive the bag. Most of them were bent, and several were broken off. Naturally they broke at the hilt, so simply supergluing them back in place was not an option. I ended up making a couple of new swords out of the same metal rod I used to make the spears. Of course this meant that the swords are not flat, in fact they're more a sort of club, but the effect I wanted was achieved: from a distance, everyone has a sword. I also was not able to keep to my standard of "two men of each pose" as so many of the swords were broken, and I did not want to take the extra time to mend them. Instead I went with as many figures as possible with unbroken swords, then fixed the fewest number I needed to. This led to three-of-a-pose in two cases, and I also ended up repairing swords after this as well.


Nevertheless, dipping -- and painting with the mindset of dipping -- is remarkably fast. I just keep telling myself that these are not my pride-of-place miniatures, so it's O.K. to be in a hurry. 'Gotta keep reminding myself of that fact. I think they look pretty darn good, if I do say so myself. For the two units, each group of 20 has taken roughly 10 hours of actual painting time, including the bases. That's about 30 minutes per figure. This does not include the prep time, though, but I don't think that took me more than 2 hours at the most per group of 20. I don't usually keep track of prep time, but I do track my painting time, so that's the only real comparison I can make with my previous painting time and style. For me, this is extremely fast. Your mileage may vary.
I also painted these two guys lying down from the swords package. I don't really plan to use them, as I consider "lying down" figures about the most useless figures possible. "Here, let me advance my fast-moving, Arabs charging with swords into your flank. But just ignore these two guys, they're having a little lie down, got a headache don'cha know." I mean, I can appreciate them for a more diorama feel, but how am I supposed to attack with guys on their stomachs? I know an army travels on its stomach, but they didn't mean it literally! But, I wanted to go ahead and paint them while I as at it, as I likely won't be back around to that package of figures ever again. Maybe if they'd been shooting, kinda like snipers or something, I could find a use for them, but as it is, well.... And just how do they fit in with the "swordsmen" when all they have is a knife and a rifle? Stop thinking about it, stop thinking about it.
 |
| "Do you see anything?" "No, I don't see anything, do you see anything?" "No, I don't see anything, do you see anything?" "No, I don't see anything, do you see anything?" |
 |
| Glamour shot of my Arabs, attacking over some sand dunes I attempted to make recently. This is the first chance I've had to photograph the hills. I'm not totally happy with how the dunes turned out. |
Next up, I'm taking a quick detour down Zombie Lane (sorry, no picutures yet). My bird-like attention span was saturated with Arabs, and I want to try out the dipping technique on something else. I had previously bought 50 zombies from Victory Force when they ran their "50 Zombies for $50" special (which they do from time to time; keep watching as it's a really good bargain).
Now, normally I'm not a huge fan of zombies. How can you tell someone that their lovingly painted, intricately detailed figure of an undead, intestine-trailing, limbless rotting human being "looks good"? I appreciate the zombie genre, but I don't live for it (pun intended).
However, I have to say these zombies have a surprising amount of personality to them. They are a nice selection of normal people who have had the utter misfortune to be turned into the walking dead (and I do mean walking, ZOMBIES DO NOT RUN; sorry, got sidetracked there), with a few recognizable historical/fictional persons thrown in as well. More on that aspect next post.
I'm currently prepping 25 zombies for priming, filing down their mold and flash lines. The metal Victory Force uses is much harder than Old Glory, and shinier too for what that's worth. The figures are reasonably clean to begin with, but because the metal is harder it takes just a little longer to get that mold line removed. (And I WILL remove all mold lines, I don't care if they are ugly, rotting, limbless, intestine-trailing figures, I will not paint a figure with mold lines showing.) But that's fairly easy; the hardest part was removing enough of the "foot tab" for the figure to be able to fit into the slot on the plastic base (included in the order, BTW). However, before I last left home, I was able to get all 25 prepped and glued in place. When next I'm home, I will need to fill the gaps left between the foot tab and the edges of the slot, and then they'll be ready for spray priming.
I hope to use a simple color palette and painting technique on them, as well, to speed them up as much as possible. I plan on using more modern day colors: blue jeans, brighter shirts, etc, and then a very pale/almost dead white skin tone, and then a dip in the Classic Black stain instead of the brown. But we shall see, as it's all subject to change after the first one gets it's bath.
Thanks for reading!


