A while back I played another game of Feudal Patrol, but I wanted to see if it would work for a dungeon crawl. The main difference I introduced was making each of my "heroes" function as if they were their own Element, much as in the optional rule for Heroes on page 73 of the rulebook. I gave each hero elevated stats, but I'm afraid I don't recall what they were, as I either didn't write them down or didn't keep them.
Get ready for a metric-ton of photos of EVERYTHING THAT HAPPENED! Why would I take so many photos? Because WHY NOT!
Remember, you can click on the pictures to enbiggen them.
 |
| TURN 1: The Heroes find their way past the waterfall to the hidden entrance. |
 |
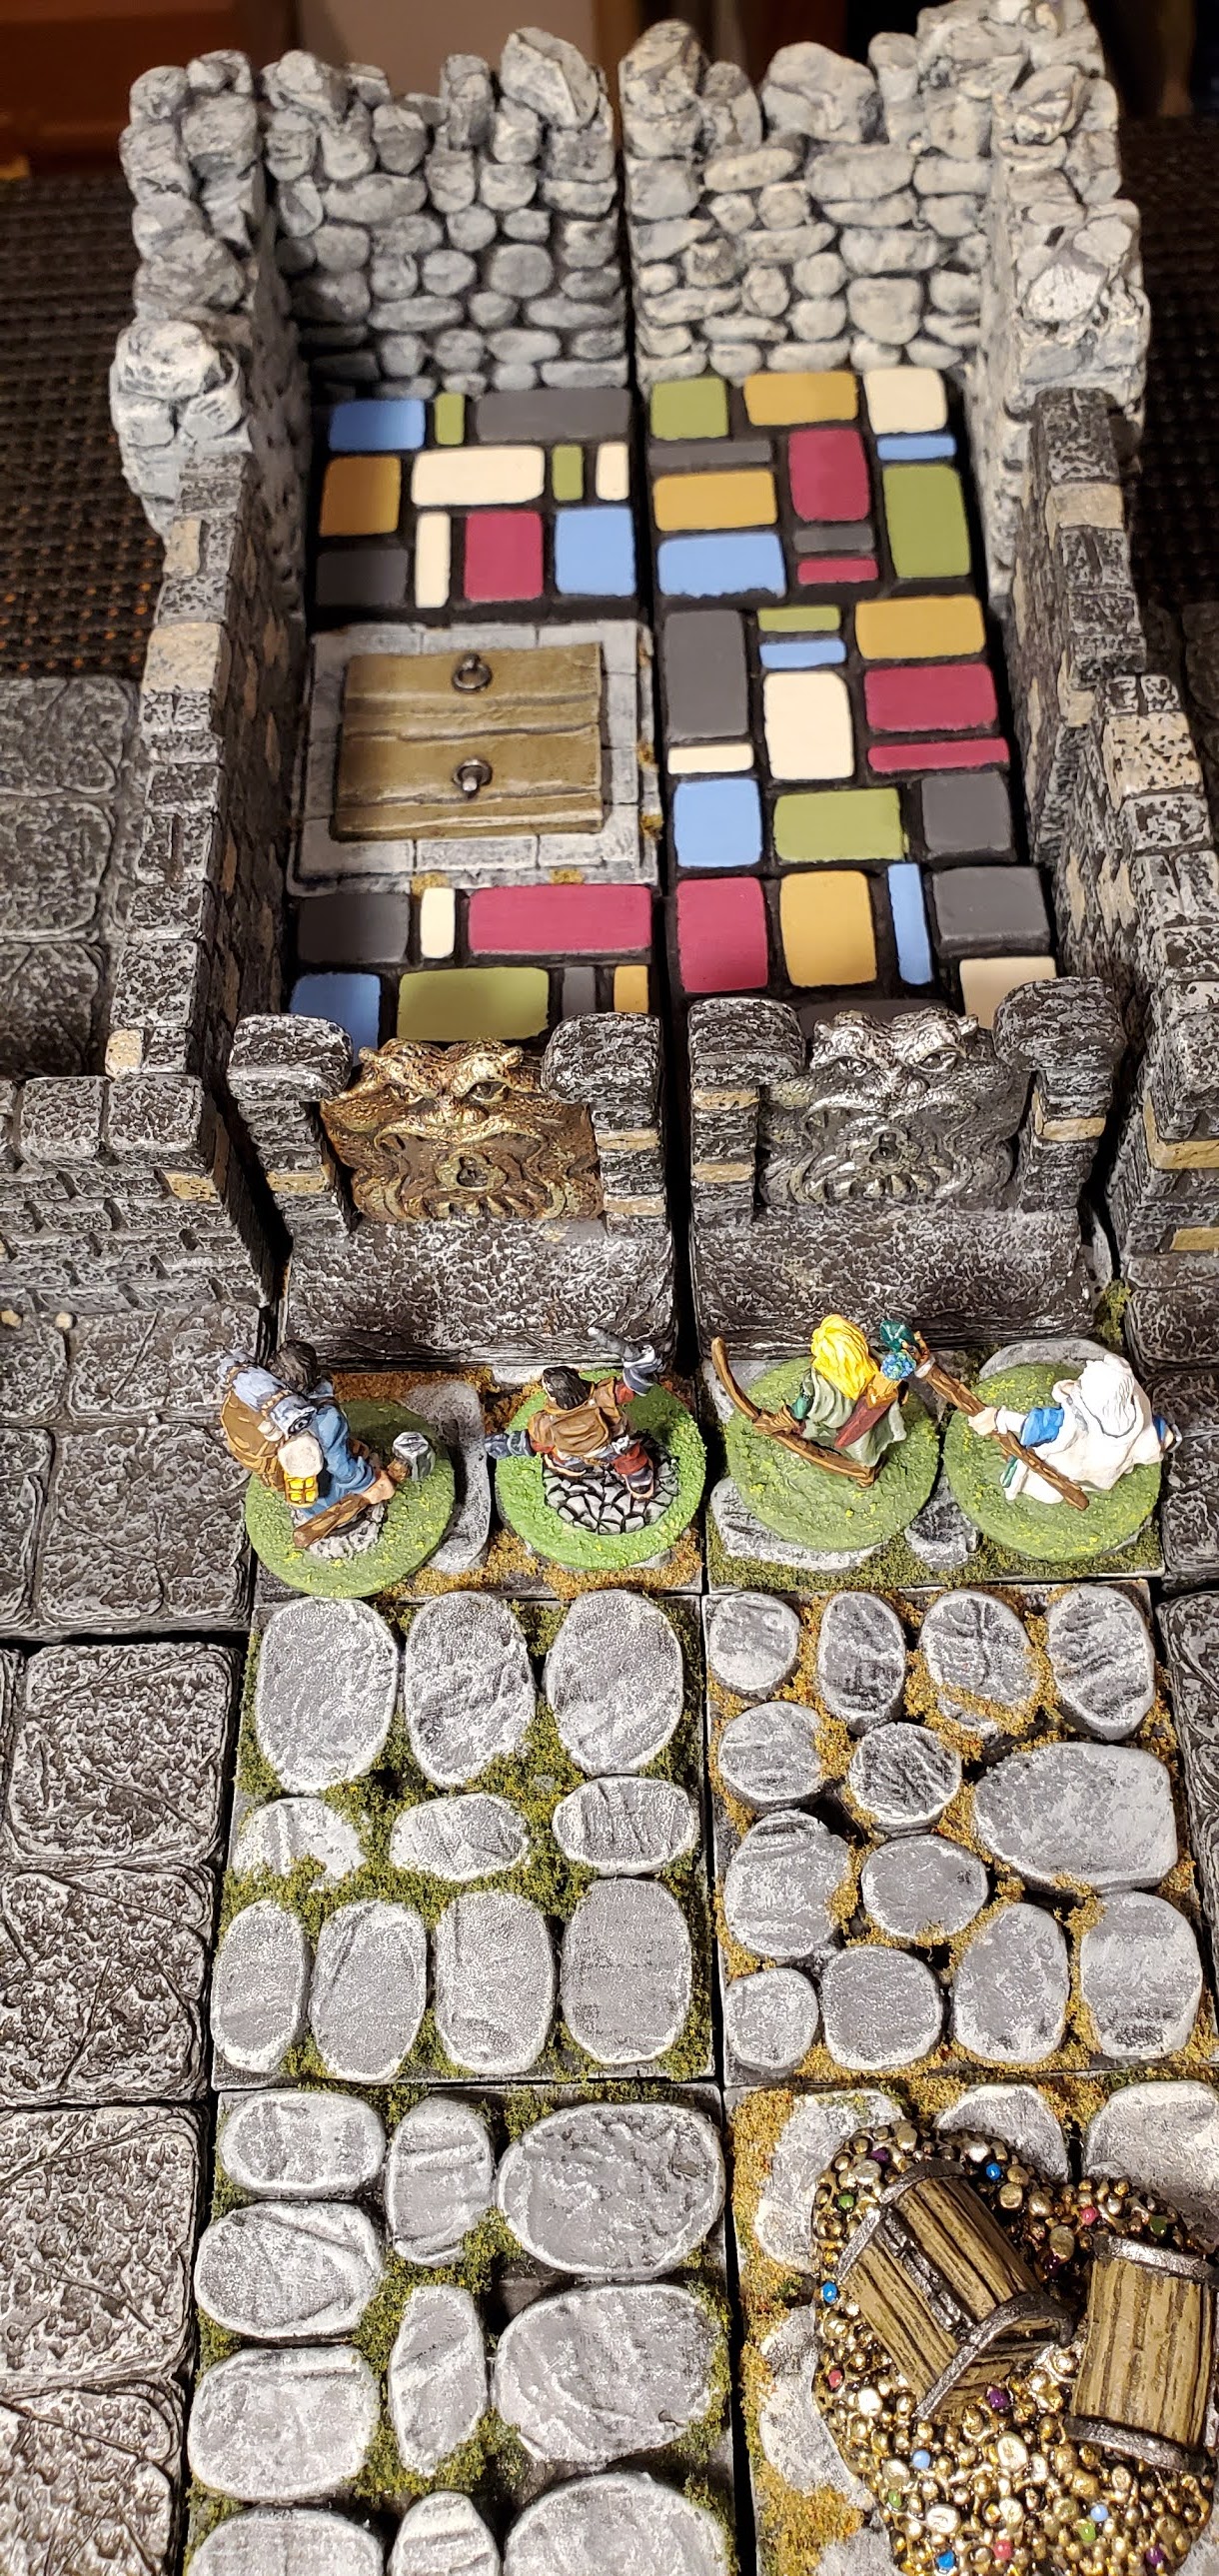
| Meet the Heroes, L to R Wizard, Fighter, Thief and Archer. |
 |
| Foul Goblins and a foul Hobgoblin leader, eating foul food and foul drink around a foul table. |
 |
| The Archer fires -- sneak attack! "That's what you get for being a bad guy! I'm a good guy, and an unprovoked attack on a bad guy is still a good guy thing to do! so there!" |
 |
| The Goblins activate and rush the Heroes, except the one Stunned Goblin, who un-Stuns. |
 |
| The Fighter and the Thief move up to Slice-n-Dice (tm)! |
 |
| Wounds are caused, and both sides move forward and back. The Thief didn't fare so well. |
 |
| The Mage advances, but cautiously. |
 |
| The Fighter and Thief activate again, and the Thief isn't going to let a couple of wounds stop him from getting through these Goblins to the gold he knows is waiting! |
 |
| More wounds are caused, but the Heroes can't seem to break the Goblin line. |
|
 |
| The Archer draws the last card before the turn ends, but can't move far enough to engage in melee. |
 |
| TURN 2: The Thief, recognizing that discretion is the better part of valor, as well as knowing he is closer to dying that he likes, "retreats" to the Wizard who might be able to heal him. (There are no "clerics" in Feudal Patrol, but the spell casters do have a healing spell.) |
 |
| Quite luckily, her Activation card is next, and she is able to successfully heal the Halfling. |
 |
| The Archer's accuracy continues, killing a Goblin. |
 |
| The Hobgoblin leader Activates, but his Morale Check card draw result is bad for the Goblins. They scarper! (At least as far as they are able.) The Goblins in the last turn were never able to Activate a second time, so the Goblin at the table has just been watching the fun, eating his friends' food. |
 |
| My memory is a bit fuzzy, but what I think happened here was either a) the next morale card caused some of the Goblins to charge, or b) the next Activation card was a black 1 and I had them do the same thing. |
 |
The Fighter Activated and met the Goblins head-on...
|
 |
| ...Stunning and wounding one. The Fighter chooses not to advance, so as not to let the Goblins get behind him too easily. |
 |
The Mage moves up in support, but once again got a poor movement allowance.
|
 |
| The Fighter attacked, driving one Goblin back but taking a Morale Check result himself. Then the End Turn card came up. |
|
 |
| TURN 3: After re-rolling the dice and shuffling the cards, the Fighter was the first to Activate, and promptly charged the nearest foul Goblin... |
 |
| ...who was a bit more prepared to fight than some of the others were; with the result that the Fighter was forced back, dropping his weapon and taking 2 wounds! "Ouch!" |
 |
The Thief, freshly healed, rushes in. "You can't do that to my big buddy!"
|
 |
| But it turns out the Goblin can do that, as he forces a Morale Check on the Thief, even though the Goblin also takes a wound. |
 |
| The Archer then finishes off the Goblin, and the Thief's morale result leaves him Stunned at the turn of events. |
 |
| The Mage moves over to assist the Fighter... |
 |
| ...and successfully heals him on her next card draw. The turn then ends. |
|
 |
| TURN 4: The Archer fires an arrow at the Hobgoblin leader, killing him. |
|
 |
| The Thief, who has the same Activation die number as the Archer, charges into the fight yet again. One way or another, the little Halfling is determined to prove himself...and get that treasure! |
 |
This time he's more than Halfling enough to murderize his foe!
|
 |
| The #5 card comes up again, and the blood-mad Halfling charges the next foul Goblin creature... |
 |
| ...and promptly disposes of him, too! Only one Goblin remains. But the next card draw ends the turn. |
 |
| TURN 5: The Thief Activates first, and regaining his senses and once again recognizing that lone heroes often become dead heroes, he "retreats" ("that's such an ugly word") to the Heroes' battle line. |
 |
| The Archer moves up to straighten the line... |
|
 |
| ...as the Goblin Activates and retreats through the closed door, revealing MOAR BADDIES. |
|
 |
| A peek inside the next room. What manner of monster is that in the back? And to where do those doors lead? TrEaSuRe? |
|
 |
| That new monster, some type of Bugbear or Ogre or some such thing, Activates and moves to investigate the disturbance. |
 |
The second Hobgoblin lieutenant Activates and moves his "men" through the door.
|
 |
| Much to the dismay of the Heroes, the Hobgoblin Activates again and is able to reach them. Fighting erupts as the foul monsters clash with the noble(?) Heroes! |
|
 |
| For the most part, the battle is inconclusive. The Fighter is wounded, as is the Hobgoblin, and the two sides separate to catch their breath. And then, the next card ends the turn! |
 |
| TURN 6: The Fighter is the first to Activate but his Morale Check results cause him to be Pinned and all he can do is un-Stun. Similarly, the Hobgoblin's Morale Check results cause him to die from his wounds and Pin the squad. Nevertheless, the Goblins are able to attack. |
 |
| The Heroes manage to hold off the attack, wounding one Goblin, but are not able to push forward. |
 |
The Bugbear moves into the door, and the lone Goblin un-Pins.
|
 |
The Bugbear moves again. "What's going on 'ere?"
|
 |
| He arrives just in time to see the Archer kill the nearest Goblin, and the Magic-user cast Wall of Fire. This is a variation of the "Wall of..." spell which normally only hinders movement, but as there is no "fireball" in the game, and I felt strongly that there should be, I modified it to be the same dimensions but do damage. |
 |
| And that damage was enough to kill all of the Goblins! |
 |
| And then, to add insult to injury, the Archer kills the Bugbear. With an arrow. Thwack! |
|
 |
| The Heroes confront the mysterious doors. |
|
 |
| Instead of treasure undreamed up, they find only more stairs leading down into darkness.... The Thief is very upset. |
|
Thus ended my dungeoneering trial for Feudal Patrol. Overall I was quite happy with how it played. Having the Heroes each Activate on their own dice versus having them all be on one Activation as if they were a single squad made it play much more like a single-figure skirmish game, which is exactly what I was going for. Each character having their own die broke up the "monotony" of Activating the entire group each time, since each character could then act as if they were an individual instead of a unit; but it still kept the uncertainty of "who will Activate next" that is part-and-parcel in Feudal Patrol.
I wish I remembered what stats I gave them, as compared to the monsters, because I think I might want to bump them up a trifle next time. The Heroes did O.K. but if this were to be a longer game, or if they were fighting more than one squad at a time, then any wounds or Stunning would be much more debilitating. I want my Heroes to be HEROES.
If next I play this again, I will likely make two changes. First, I will do away with the "End Turn" card, and instead just let both sides get both Activations; and when the end of the deck is reached, then re-shuffle and re-roll. In a larger battle, I see the wisdom of the "End Turn" card, but in man-to-man combat like this, it feels a bit artificial to me.
Second, I will definitely include Wall of Fire in my spell repertoire! I don't recall what damage level I had it cause, but I don't disagree with my past self: Fireball SHOULD be devastating. I might even include some other types of spells, but also try to stick with the 3-spells-per-caster limit.
This game plays really fast, so fast that stopping to take pictures slows things down a lot; so much so that it's hard to get a picture of each thing that happens, but if you skip a few things then it's difficult to follow what happened just by looking at the pictures! Any future games, I will probably only take pictures at crucial, representative points.
By the way, the dungeon terrain I used is from
Acheson Creations, from a previous Kickstarter. I wrote about it
here as well.
Thanks for reading!


