Yes, I participated in the Reaper Miniature Bones Kickstarter last year (and for that matter, I backed the Bones 2 Kickstarter too; hey, I'm sick, I need help). Overall I'm happy with the Bones figures, mixed with a tiny bit of disappointment.
The Bones plastic is better suited to large figures, yet most of the basic figures (in the Kickstarter) are human sized. They have decent detail on the human-sized figures, but metal is still better.
I totally understand that this is a great way for Reaper to get new blood into the hobby. Relatively speaking, it's a very inexpensive way to provide miniatures to new painters. (The Kickstarter was a super-duper inexpensive way to get a lot of figures; that's partly why I backed it.) I've seen many postings on forums (fora?) from newby painters, all excited and a-quiver over painting their first miniatures. This is a Good Thing.
The Bones figures, however, IN MY OPINION, do not merit my spending the usual way-too-much time per figure that I usually do on them.
One last thing I am not happy about is the fact that they are not prime-able. Supposedly they are not meant to be primed, and in point of fact this works fine if that's how you paint anyhow: straight unwatered-down paint on the Bones. But that's not how I paint; that's never how anyone has ever painted in the whole history of acrylics ever. I've been painting miniatures since 1988, and I've always always always diluted the paint with water. It's how I was taught. It's how the professionals did it; it's how they still do it. I don't know how to paint without diluting the paint. I don't know why you'd want to paint without diluting the paint first. But if you water the paint down, it won't stick to the Bones. And if you spray prime it (again, as I've done since 1988 on every figure I've ever owned) it becomes tacky.
The only thing I was able to figure out to do was to use Reaper Brush-on Primer first. This allows me to use my tried-and-true technique of thinning my paint, but it DOUBLES the amount of time needed to work on a figure.
Accordingly I decided to paint them as quickly and simply as possible, while still aspiring to a high enough standard that I won't hate the end result. Here, then, are those results of the first two batches of Bones that I have painted.
I went with the more useful (to me) generic dungeon monsters first, as well as those that required the least amount of detail work.
If you click on the pictures, they will expand to fill your screen with gloriously-mundanely-painted Bones.
 |
| First up is my personal favorite, the Owlbear. I love this sculpt, and I tried to get the eyes to match the crazed feel of the pose. The Monster Manual describes the Owlbear as having "bestial madness in its red-rimmed eyes," so, yes, there is a bit of red there too. I did want his eyes to stand out though, so went with the yellow. |
 |
| Next up, a majestic Griffin. One thing I did to speed up the mass-batch painting was to use the same colors over and over again on all the figures. I don't really expect most of them to turn up at the same time in a game, so having similar colors won't really be too noticeable. |
 |
| An "Eyebeast" (aka Beholder) on the left, and the Owlbear again. I'm not sure why I didn't get a solo picture of the Beholder. These are excellent examples of where Bones shines: larger critters with normal details. |
 |
| Moving on to the smaller beasts, here we have (L to R): a Rust Monster (Reaper calls it an "Oxidation Beast"), a Bat Swarm over a tombstone, a Hell Hound, and a Mimic (again, Reaper calls it a "Mocking Beast"). The only information I could find about the Hell Hound in the Monster Manual said it had glowing red eyes and a soot black mouth. |
 |
| Vermin! (L to R, back to front): Dust Scorpions, Spiders, Scarab Beetle Swarms, Fire Beetles, a Rat Swarm (yes, it came with two but I somehow missed the 2nd when digging them out of the box), and Spider Swarms. |
 |
| Rats! Extra large (and "dire" to judge by their eyes). |
 |
| Skeletons. If I ever become an Undead abomination, I hope I'm a skeleton archer: that way the bowstring won't hurt my arm when I shoot! I didn't take time to straighten (or otherwise adjust) the bows. It's Bones. It is what it is. |
 |
| Some dressing for your naked dungeon: two Candelabra, a sacrificial Altar, a (healing?) fountain (aka the "Well of Chaos" per Reaper), and a tomb (currently empty, called "Vault and Lid"). |
 |
| This is a slightly closer view of the fountain and the inside of the tomb. The water is glossy, although it's difficult to see here, and the rose in the coffin is part of the sculpt. |
I forgot to mention that the dungeon-y floor and walls above are from the Legendary Realms Terrain Kickstarter I mentioned in my last post.
Following these, I tackled the "translucents."
 |
| Team Fire (L to R): Medium Fire Elemental, Large Fire Elemental, a Burning Sphere Spell Effect, and a Wall of Fire. I tried very hard to highlight the figures without obscuring the translucent quality of the plastic. I like the concept of the translucents but the execution left me a little cold (kind of funny since these are fire and all). I felt they needed something to help them out. They were almost too translucent, so much so that you couldn't really see the figure! |
 |
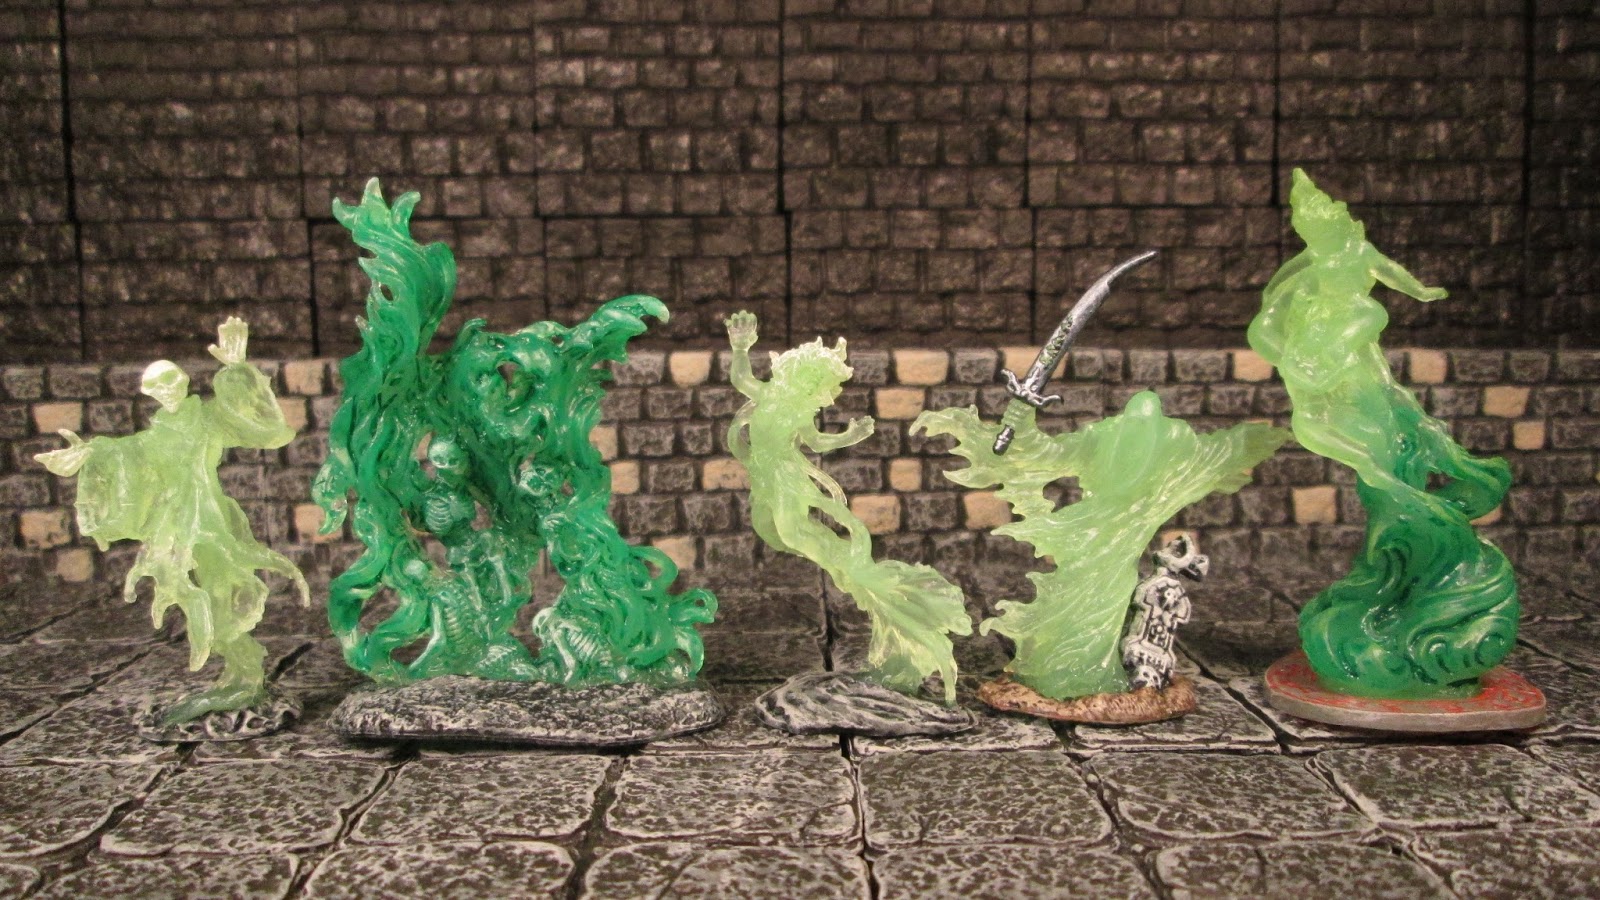
| Team Spook (L to R): a Spirit, the Night Spectre, a Banshee (Labella DeMornay by name), a Grave Wraith, and the Ghostly Summons. To darken the green I used some old GW Green Wash. |
I don't have any better pictures of the translucents because they are very difficult to photograph! Either the camera won't focus on them well, or you really just can't see them. So you'll have to make do with these; sorry.
You may very well think you have seen these greens and reds somewhere else, and you'd be right! Specifically, I very nearly copied and pasted my painting technique straight from the Reaper Miniatures forum, which you can see here. Scroll down about halfway and you'll see what I mean. I'm not afraid to admit when I steal someone else's good idea.
Also, as an FYI, nearly all of the paint I used for everything seen here was Apple Barrel or similar craft paint. The quantities I needed were so large that I didn't want to "waste" my expensive Reaper paints that way. Job's a good 'un!
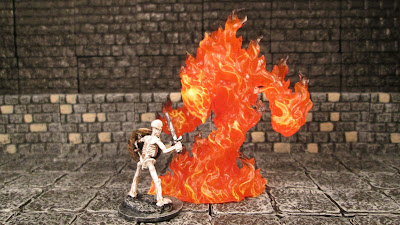 |
| A Reaper Bones skeleton battling the Large Fire Elemental, for scale comparison. Really, though, who can hurt the other? |
 |
| A final glamour shot. Team Fire led by a very old Ral Partha wizard gives battle to an even older RAFM ghost-chick who is now leading Team Spook. |
For what it's worth, the dungeon terrain seen in the Fire and Spook pictures is from the Dwarven Forge Kickstarter I backed. I went for the unpainted tiles. What you see here are the results of my painting the tiles in a manner similar to what Stefano Pokorny from DF talks about in his instructional videos. No, I did not buy Pokorny Paints or brushes. No, I will not buy them. No, I don't need such a goober making videos like that. No, Stefano, you are not the first person to ever drybrush something. Good grief....
Anyway, the painted portion is obvious, and the upper walls are the unpainted tiles just piled up to hide the rest of my table. So you can see the difference pretty well, in case you're interested in buying some yourself. I'll have a full blog post on the Dwarven Forge tiles once I finish painting them all, at some time in the future.
Thanks for looking, and happy Bones-painting to you too!